
部署 Hugo 记录
Hugo 是静态网页生成器
A Fast and Flexible Static Site Generator built with love by bep, spf13 and friends in Go.
本文记录用 Hugo 和腾讯云静态托管\Github 托管创建个人博客
参考资料
Hugo
安装
假设使用文件夹 C:\Hugo 作为目录
创建文件夹 C:\Hugo\bin 存放压缩包
创建 C:\Hugo\Sites 作为新项目起点
设置环境变量
set PATH=%PATH%;C:\Hugo\bin
检查 hugo 命令是否可以使用
hugo version
本文显示版本:hugo v0.101.0-466fa43c16709b4483689930a4f9ac8add5c9f66 windows/amd64 BuildDate=2022-06-16T07:09:16Z VendorInfo=gohugoio
创建新 Site
cd C:\Hugo\Sites
hugo new site quickstart
添加主题
cd quickstart
git init
git submodule add https://github.com/theNewDynamic/gohugo-theme-ananke.git themes/ananke

echo theme = "ananke" >> config.toml
添加文章
hugo new posts/my-first-post.md
启动本地 Hugo 服务
hugo server -D
打开本地网址 http://localhost:1313/. (具体端口可查看日志)
构建静态页
hugo -D
-D 表示构建草稿,具体配置可用 hugo --help 查看命令
默认输出在 ./public/ 文件夹
腾讯云 静态托管部署
- 登录 云开发控制台,单击新建,选择空模板,单击下一步,填写环境名称并开通“按量计费”环境。
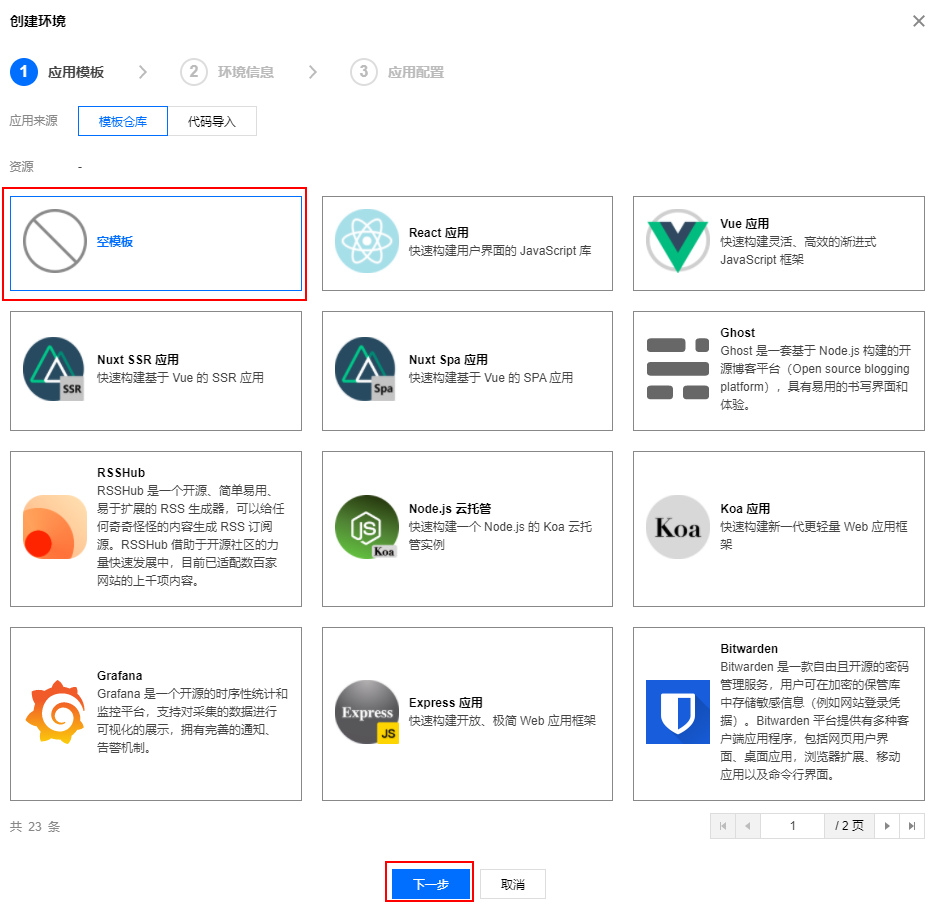
开通环境以后,进入 环境概览 页面请记住您的环境 Id,这个 ID 后续部署需要用到。
-
在本地安装 Node.js。如未安装请前往 Node.js 官网 下载安装,并确保 Node.js 安装成功。
-
打开命令提示符,执行以下命令安装 cloudbase cli:
npm install -g @cloudbase/cli
- 执行以下登录命令登录云开发:
tcb login
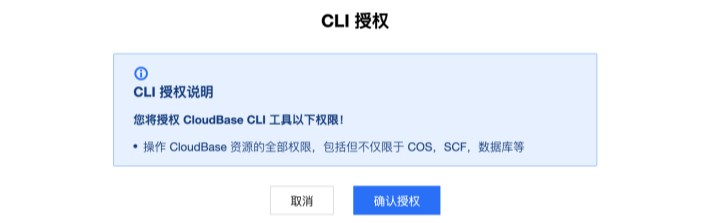
登录成功如下图所示:

- 在弹出的页面中单击确认授权进行授权:
- 执行以下命令,在 hugo-site 中部署 public 目录中的文件:
cloudbase hosting deploy ./public -e EnvID
此处的 EnvID 替换为上述 步骤 创建好的环境 ID。
 7. 登录 云开发控制台,进入 静态网站托管 页面,可以找到默认的域名,单击域名,即可看到您刚部署的 Hugo。
Github 托管
- 新建 Github 组织 dearydj, 仓库 dearydj.github.io
- github 仓库 setting->page 页面可以修改分支和仓库位置
- 使用 root 目录,将 public 文件夹转换为 git 仓库,并推送
- 使用 docs 目录,将新建 site 所在文件夹转换为 git 仓库,并推送
- 添加新 yml 配置文件 ./config-github.yml,加一行 publishDir: “docs”,用一下命令构建
hugo --config ./config-github.yml
我的站点
hugo 文档
参考
GithubPage 介绍
gh-page 配置参考
自定义
使用 blog 为网站名
cd C:\Hugo\Sites
hugo new site blog
cd blog
更换主题
https://themes.gohugo.io/themes/hugo-papermod/
https://adityatelange.github.io/hugo-PaperMod/
git submodule add --depth=1 https://github.com/adityatelange/hugo-PaperMod.git themes/PaperMod
git submodule update --init --recursive
git submodule update --remote --merge
# 把这篇文章放进去
hugo new posts/Hugo.md
# 启动本地Hugo服务
hugo server -D
# 构建静态页
hugo -D
I replaced integrity=“{{ $stylesheet.Data.Integrity }}” with integrity=“” and it worked!
换行符问题
Hugo 使用 BlackFriday 把 markdown 转换为 HTML,可以在 Hugo 的配置文件中添加以下设置,将换行符强制输出为硬换行。
本文配置未生效
blackfriday:
    extensions: ["hardLineBreak"]
本地图片问题
如何让 Hugo 和本地都能正常显示本地图片,且本地插入图片只需要复制
编辑器以 vscode 为例
- hugo 的 static 文件夹下会被打包,文章 markdown 文件构建后位置在 public/content/post/your-post-name 文件夹下
- 如果 static 下防止 image/my-image.png 图片,文章打包后引用到图片有两种方式
- /image/my-image.png
- …/…/image/my-image.png
- 本地安装插件"cweijan.vscode-office",用于图片自动复制到本地,路径配置为如下格式
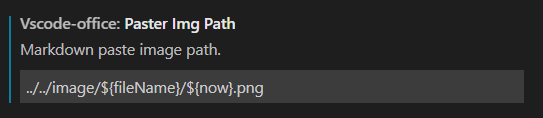
用…/…/image/my-image.png 形式是因为/image/my-image.png 会保存到意外的路径 - 链接本地目录和 static 目录
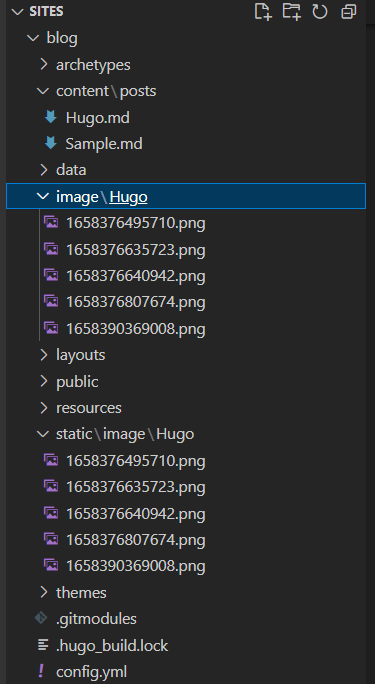
创建好.\static\image 目录(真实目录,Hugo 的 static 不能是软链接)
通过软链接创建.\image 目录如果要上传 Git 仓库,记着把.\image 加入到忽略列表
cd blog
mklink .\image .\static\image /J
完成后目录结构如下
本文列出的两个 Hugo 部署路径中,显示的图片是基于图床中的,但每张图片上面会有一个注释的本地图片,可以打开开发者工具查看,如上一张图
<!--  -->

问题:Hugo 支持层级目录,vscode 插件还未找到如何配置
Latex 公式问题
Step 1
首先在安裝好的主題裡面 layouts/partials/mathjax_support.html 新增.html 檔
  MathJax = {
    tex: {
      inlineMath: [['$', '$'], ['\\(', '\\)']],
      displayMath: [['$$','$$'], ['\\[', '\\]']],
      processEscapes: true,
      processEnvironments: true
    },
    options: {
      skipHtmlTags: ['script', 'noscript', 'style', 'textarea', 'pre']
    }
  };

  window.addEventListener('load', (event) => {
      document.querySelectorAll("mjx-container").forEach(function(x){
        x.parentElement.classList += 'has-jax'})
    });
Step 2
在 layouts/partials/header.html 的</head> tag 裡面再新增這段 code
{{ partial "mathjax_support.html" . }}
Step 3
最後在 assets/css/header.css 檔裡面再加上這段 code,如果沒有這個檔案,就把 code 加到所有頁面都會用到的 CSS 檔
code.has-jax {
    -webkit-font-smoothing: antialiased;
    background: inherit !important;
    border: none !important;
    font-size: 100%;
}
范例
$$a_{PI}(x|D) = E[u(x) | x, D] = \int_{-\infty}^{f'} \mathcal{N}(f; \mu(x), \kappa(x, x)) \ df
=\phi(f'; \mu(x), \kappa(x, x))$$
顯示很完美
只不過會 Mathjax 在 parse 底線的時,有時候會有一點問題,如
$\begin{equation} x_t = \mathop{\arg\max}_{x \in X} \ \ a_{PI}(x|D_{1:t−1}) \end{equation}$
顯示會出現
\begin{equation} x_t = \mathop{\arg\max}{x \in X} \ \ a{PI}(x|D_{1:t−1}) \end{equation}
會壞掉,解決辦法就是前後都加個 ` 符號,變成
`$\begin{equation} x_t = \mathop{\arg\max}_{x \in X} \ \ a_{PI}(x|D_{1:t−1}) \end{equation}$`
$\begin{equation} x_t = \mathop{\arg\max}_{x \in X} \ \ a_{PI}(x|D_{1:t−1}) \end{equation}$
$$ \begin{equation} x_t = \mathop{\arg\max}_{x \in X} \ \ a_{PI}(x|D_{1:t−1}) \end{equation} $$
\begin{equation} x*t = \mathop{\arg\max}*{x \in X} \ \ a*{PI}(x|D*{1:t−1}) \end{equation}
顯示就會正常了,但是會以 Inline Code 的方式顯示,就會變的小一點。這種現象的主要原因是在 Step 1 我們是把 LATEX Code 和 Markdown 的 code 一起 parse,但 Markdown 語法本身就會用到底線,這會導致重複定義同一個符號,所以就需要而外把 LATEX 抓出來塞到 Inline Code 裡面處理,就不會重複定義。但基本上很少遇到有問題的情況,若遇到顯示有問題再加 ` 就好。
写在最后
Hugo 优点
- 静态页可以避免服务器风险
- 能使用本地图片
但目前存在一系列问题
- MarkDown 解释器的软换行配置不生效
- MarkDown 语法支持有限,如常用的图片标签
- 能使用本地图片,但却存在限制
- 没有图形界面,使用太过耗时
- 表头会污染 MarkDown 源文件